
Many of the features of Sigma are controlled by choices made in the Settings window. To help you get the most from Sigma, we are going to walk through each section in detail. Sigma Enterprise and Sigma Professional have all options available, while Sigma Personal has only the Company Info, and Files options. In any of the Sigma versions, click on File in the main toolbar, and go down to Settings and click on it.
GENERAL TAB #
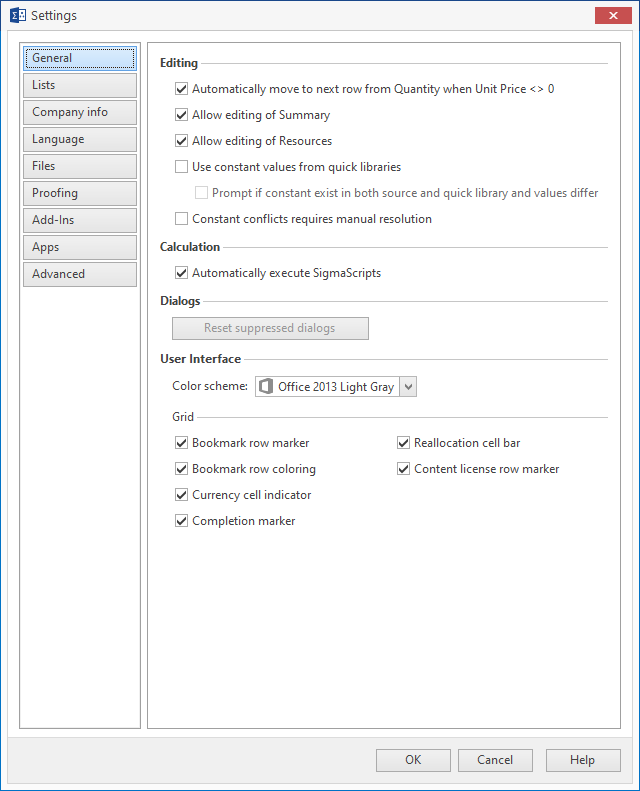
Automatically move to the next row from quantity #
This helps you work faster. If you drag an item from a library, or manually create a component with a unit cost, after entering the quantity and pressing Enter, you are taken to the next line, without having to click on it.
Allow editing of Summary #
With this box checked, you can edit the following columns in the Summary tab: MM, Disc %, Disc, Unit SP, Sales Price, Total PM, and Total MU. If a component is edited, Sigma recalculates the entire component line. If a column is edited on the totals line, then the changes are dispersed proportionately across all the components contributing to that total.
Allow Editing of Resources #
With this box checked, you can edit the following columns in the Resources tab: Text, No., Price/Quantity, Total Cost, Unit SP and Sales Price. If a component is edited, Sigma recalculates the entire component line. These columns can only be edited on the individual component level.
Use Constant Values from Quick Libraries #
If you have a Quick Library activated that has, for example, an electrician’s labor charge as “elec” (a constant) with a value of $50.00 and you drag an assembly from a different library that has the electrician’s labor, with the same constant “elec”, at a value of $40.00, Sigma will recognize the conflict. With the Use constant value from quick libraries checked, the quick library value will be used. If you also have the Prompt if constant exists in both source and quick library and values differ box checked, Sigma will open a window asking you to choose one or the other value for that constant.
Constant Conflicts Require Manual Resolution #
Checking this box assures that all conflicts between different source files will be brought to your attention and will need to be resolved manually.
Automatically Execute Sigma Scripts #
If you have created “smart assemblies” using Sigma Script, checking this box assures that the script will run automatically.
Display Guide Dialogue when a new Document is Created #
If this box is checked, every time you start a new estimate, the dialogue box telling you how to get support will open.
Reset Suppressed Dialogues #
This is disabled and is a piece of flotsam that will be removed in the next version of Sigma.
Color Scheme #
There are a dozen color schemes to choose from in the drop-down list. Go crazy!
Grid #
By hovering the mouse over a check box you’ll see a brief explanation of that function. Checking the box turns that feature on.
LIST TAB #
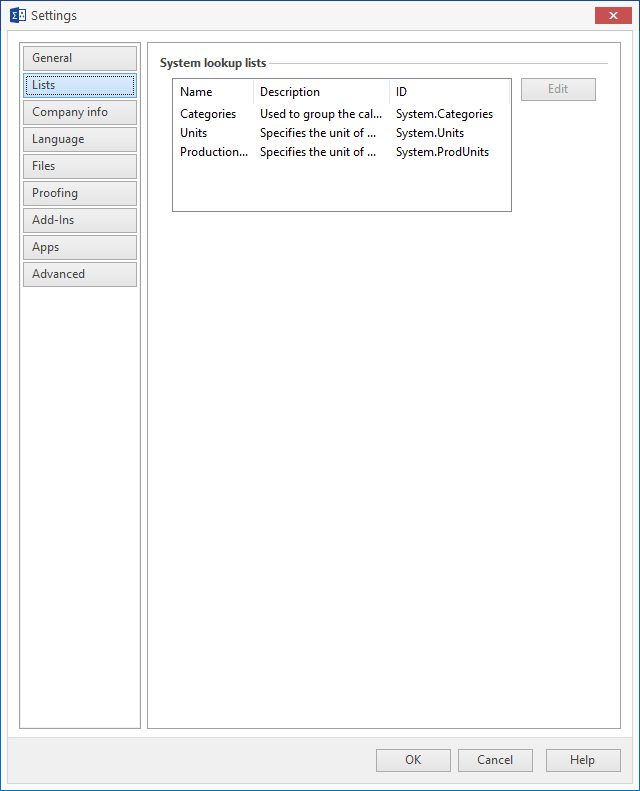
When you click on the Lists tab, the System lookup lists dialogue box opens on the right. It is here that you can do maintenance on the Categories, Units, and Production Units lists that Sigma uses. (All three work pretty much the same) Click on Categories, then click the Edit button. A properties window opens with two tabs.
The General tab gives you the name of the list and a brief description. Clicking the More Options button on the General tab lets you decide if you want that to be required field, and if you want all the child components to inherit the value of the parent. It also shows you the field ID, which you shouldn’t change – Sigma uses this field ID in its programming. It is shown for informational purposes only, should you decide you want to write script that uses that field.
The Values tab allows you to edit, add or delete values from the list. You can also decide to Allow values not in the list, to add unlisted values to the list, and whether you want to be Prompted before adding an unlisted value. The Load button lets you load a saved list, and the Save button, of course, saves a list as a .dat file. The Collect button tells Sigma to scan the estimate for vales not on the list and add them.
COMPANY INFO TAB #
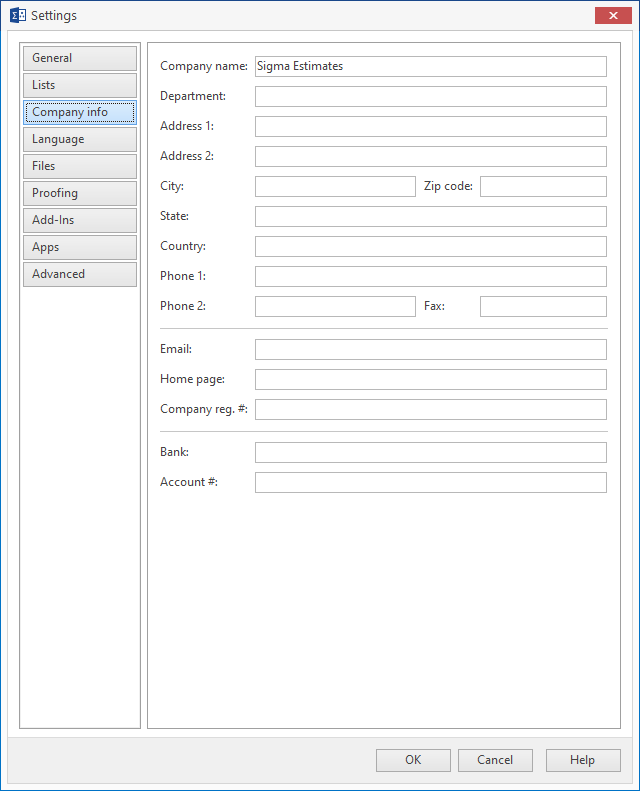
The Company Info tab is where you can enter the information about your company. This information is used by Sigma in each new estimate you make.
LANGUAGE TAB #
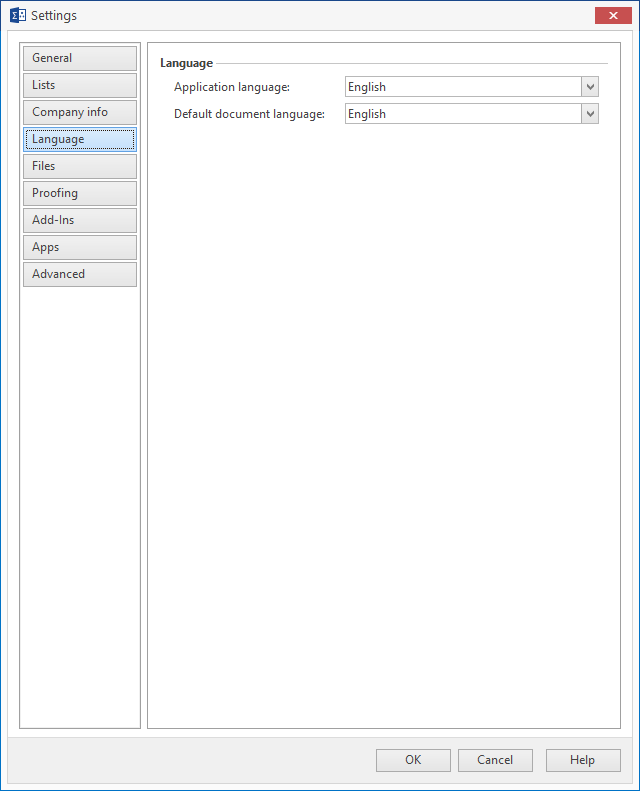
This tab lets you choose English or Danish as the application and document language.
FILES TAB #
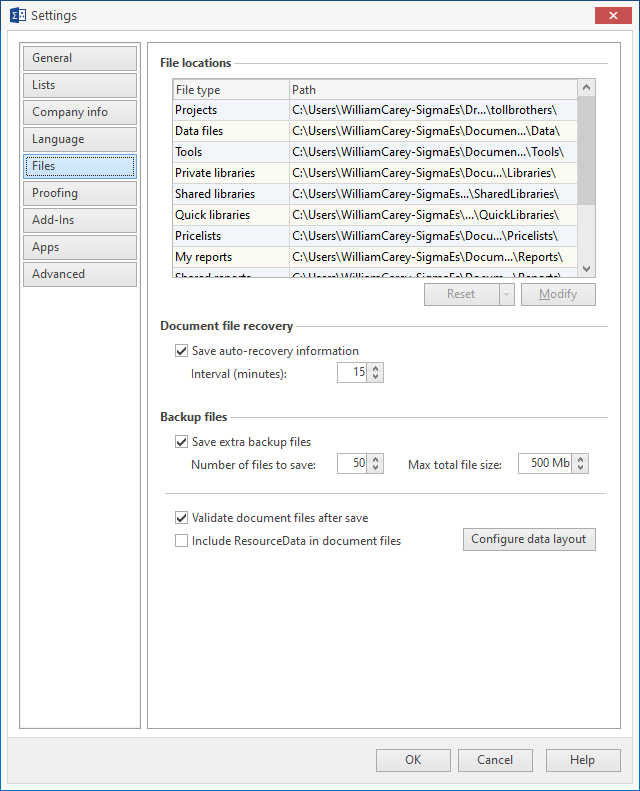
File Locations #
The Files tab is used to set the locations for all the different files that Sigma uses, from libraries to saved projects, as well as to set the Auto Save interval and the number of backup copies of the estimate.
When Sigma is installed, default file locations are created, and these can be seen in this window. You can change these locations by clicking once on the path you wish to change, and then clicking on one of the icons that appear at the right side of the path name. The three dots icon will let you select a folder in windows explorer, while the folders icon will open the specified folder in windows explorer.
Regardless of which icon you select, all the typical windows explorer functions will be available.
Document File Recovery #
If you wish to autosave your estimate, check this box and select an interval. You can access these auto-saved versions of your estimate by clicking on Files in the main toolbar, and then on Info, and then click the Manage Versions button.
Backup Files #
Checking this box saves extra backup files of your estimate. You can set the number of files, and the overall size of the files.
Validate Document Files After Save #
If checked, Sigma will run a final Validation test on the estimate when it is saved.
Include Resource Data in document files #
This allows you to save data in an estimate that may be used by, for instance, an accounting program.
Configure Data Layout #
This allows you to configure the Resource Data for use in another program.
PROOFING TAB #
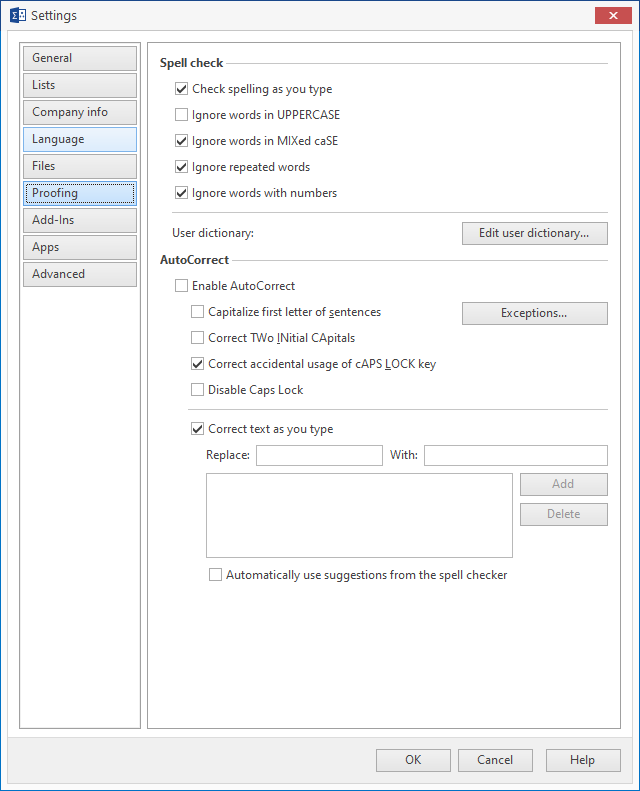
Spell Check #
This is straight forward. The Edit user dictionary lets you add custom names and abbreviations that you use often to your dictionary. Another way to add words to your dictionary is to select Add when you right click on a misspelled word.
Autocorrect #
This section is again fairly straight forward. You will need to check the Enable Auto Correct box to be able to use any of the subsequent selections.
ADD-INS TAB #
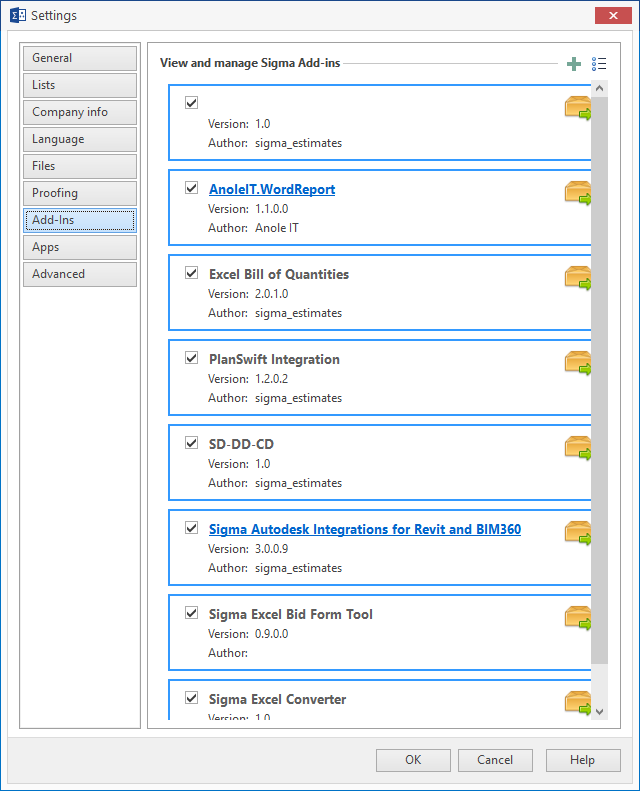
This tab lets you enable or remove add-ins and integrations from your Sigma installation. If the box next to the name is checked, the add-in or integrations is enabled. Simply uncheck the box to deactivate it. After clicking OK in this tab, a window will open asking if you want to restart Sigma now. Your choice, but in most cases, Sigma will need to restart for the changes to take effect.
APPS TAB #

Add-ins and integrations for Sigma are released as “sigmapackages”, a proprietary file type that installs all the files needed for an add-in or integration. During installation, the information shown in this tab is added. While the Add-ins tab lets you activate or deactivate an add-in or integration, the Packages Tab lets you uninstall an add-in or integration. Here you will also find the publisher, date installed and the version number.
ADVANCED TAB #
Launch #
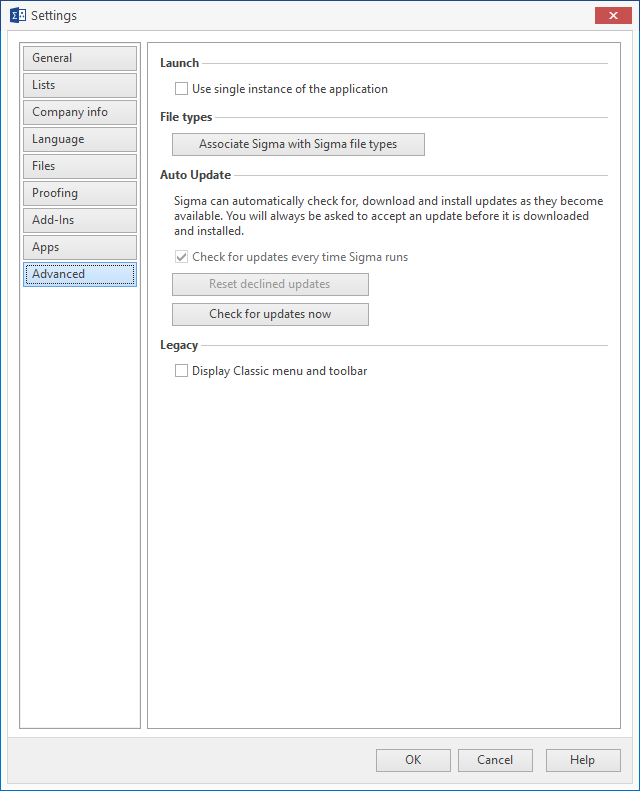
If this box is checked, Sigma will only be able to run a single instance of the application. If unchecked, you will be able to start Sigma multiple times and run them simultaneously.
File Types #
At times windows will lose the association between a file type and the application that is supposed to run it. If you double click on a Sigma file type (*.sig, *.sli or *.sit) and the file does not open, click the Associate Sigma with Sigma File Types button and windows will reset the association.
Auto Update #
Sigma checks for updates every time it starts, and this button is checked by default. The Check for updates button does just that: asks the Sigma server if there is a newer version of Sigma available. If there is, you’ll be prompted to install it. If you wish to change this configuration, please contact Sigma Support.
Legacy #
Checking the Display classic menu and toolbar adds a new tab to the toolbar named, you guessed it, Classic. If you click on this tab, you’ll see the legacy menu and toolbar from older versions of Sigma.


