This guide assume you have read “Installing Sigma Autodesk Integrations for Revit and BIM360” guide and uploaded the sample files. If not, please do that first. Also please read “Connecting Sigma to the Revit sample model” and “Importing the model into the Sigma sample template” before proceeding.
In the previous guide, you saw that you can rearrange the WBS by simply dragging and dropping headings and components to new headings as required and doing this before you add costs or after is OK.
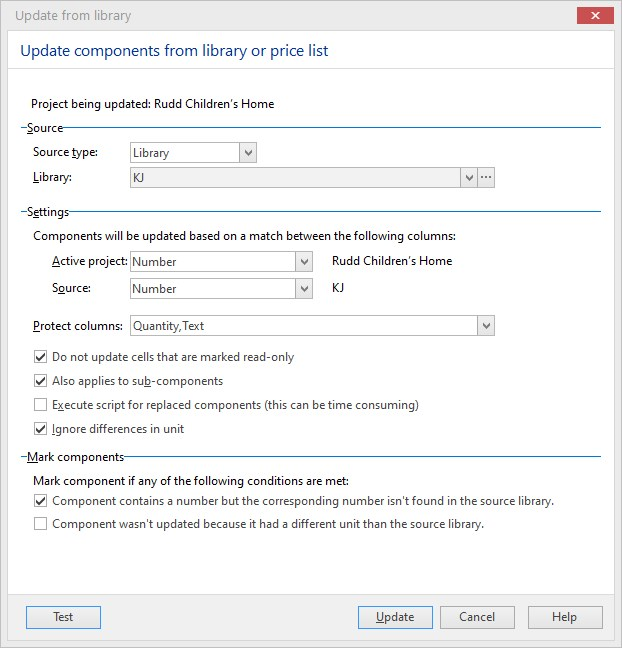
You can add costs to the sample model estimate by using Sigma’s built in Update from Library function. Click on the Libraries tab, then Update from library, and this window will open:
In the Settings section, select the column that you are going to match from the estimate and the library to update the pricing. Normally it is Number to Number, or Text to Text. It could however be any column that exists in the library and the estimate, even a custom column. Next, choose the column to protect from updating, quantity of course, but any other columns also. The next 4 check boxes let you protect cells marked read only, apply the update to sub-components and ignore differences in unit designation.
In the Mark components section, you can choose whether Sigma will mark certain items meeting those conditions.
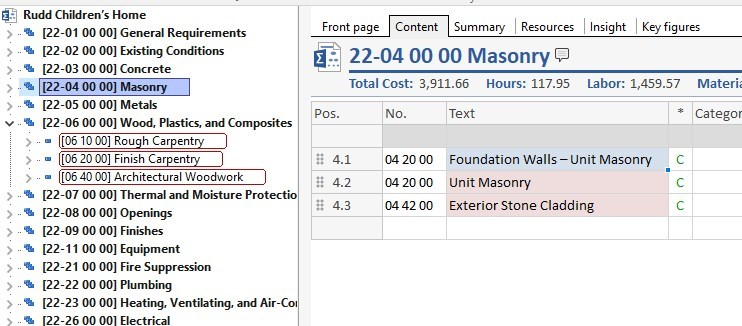
The Test button will show you the what the resultant update will produce in terms of the numbers of items updated or skipped or marked. Marked items will look like this:
The reason the sample model can be updated with the library costs is that the number of the assembly in the library has been entered into the revit model and exported with the rest of the data from the model. If you import a model that does not have the assembly numbers corresponding to your library, costs can be added by type coding the estimate. Please see our guides on type coding on the Community pages of our web site.


