Overview
If you are like most estimators, you have a wealth of knowledge and data in excel. This historical data contains estimates, assemblies, sub numbers and unit costs that can be reused to develop your baseline plug numbers for a new bid, and can help to vet sub numbers when they come in. Historical data can also be used to give you order of magnitude values on bids, and aid in preconstruction SD and DD budgets.
Because historical costs are so valuable, Sigma has made it easy to import this data into an estimate, a template or a Cost Library. By bringing your data into Sigma you not only have quick access to it, but you start in Sigma with data that is your own, taken from jobs that made money and from sub bids that were spot on. This guide will show you how to get your data into Sigma and organize it for reuse.
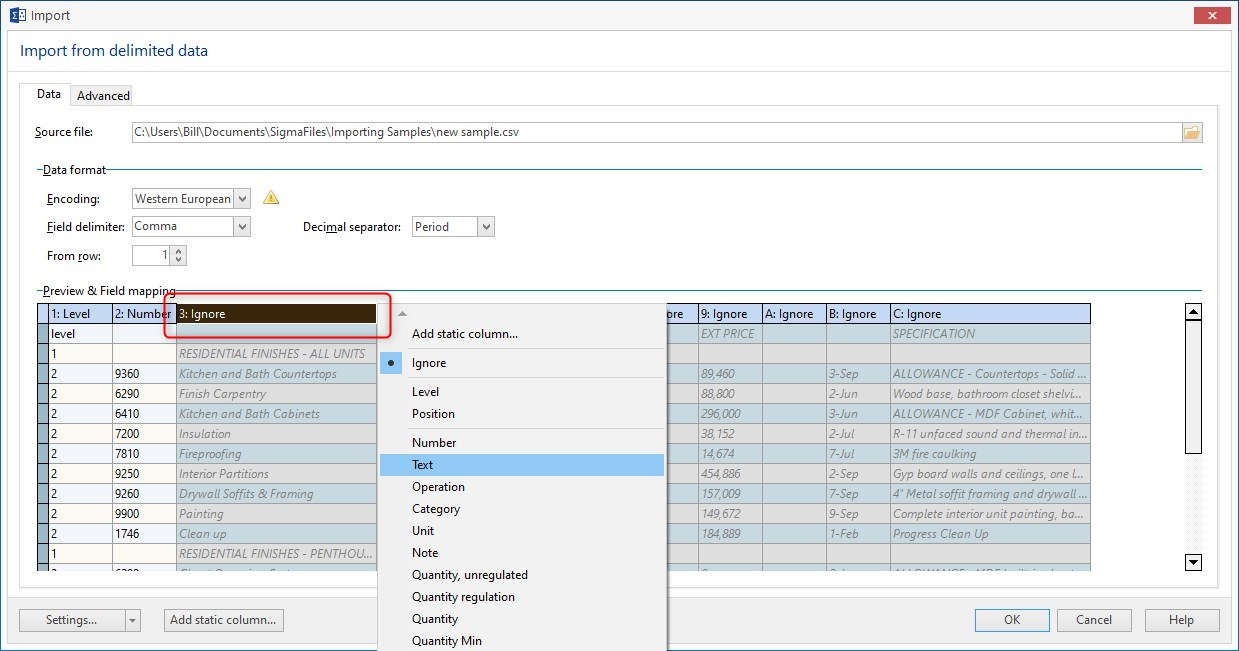
In general, you import info into Sigma by saving your excel sheet as a csv file, or by copying it in excel and pasting it into Sigma. Both methods depend on the same window to organize the imported data by mapping the columns in your spreadsheet to the columns in Sigma where you want the data placed. For instance, map the quantity column in your spreadsheet to the quantity column in sigma, and so on. In the picture below, you can see that when you click on a heading in the window – in this case I clicked on Ignore – a drop down list opens so that you can choose which column in Sigma to import to. Both importing a csv file and pasting from excel use this same mapping window.
Setup
There are several important things to keep in mind before you start the import:
-
You need to have an estimate open, usually a blank one. I prefer to use the Large Estimate template in Sigma. (Click File, New, then pick the Large Estimate template). You can also import to an existing estimate as well.
-
If you have columns in your spreadsheet that do not correspond to the standard columns in Sigma, you need to create custom columns for this info before you import so the custom columns will be available to import to. For instance, you might have cost codes, phases, areas, vendor names, etc. that require a custom field (column) in Sigma. (And remember, you can have unlimited number of custom fields.)
-
Any columns in your spreadsheet that are to be imported as numbers need to be formatted as numbers in excel before importing or Sigma will not recognize them as numbers and zeros will be entered in that column.
-
The row where the import will start is important. You may have column headings in your excel sheet and you would not import these. Select the first row of data in the From row drop down box.
Importing from csv file
Excel is invariably setup in a horizontal manner, with the categories labor, material, subcontractor, equipment, etc occupying cells in the same row. Sigma is arranged with categories in a vertical fashion, with each category on a separate line, so your spreadsheet needs to be rearranged from this

to this:
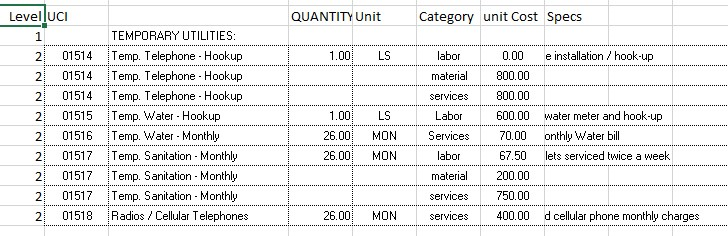
While this may seem complicated, it really isn’t. You are simply restructuring your spreadsheet so that the value for each category is in its own row. This can be done by using a macro if your sheet is consistently laid out, or the work can be given to a junior estimator, or even a clerical staff member. And it is only for the categories that you need to do this: labor, material, equipment, subcontractor, etc.
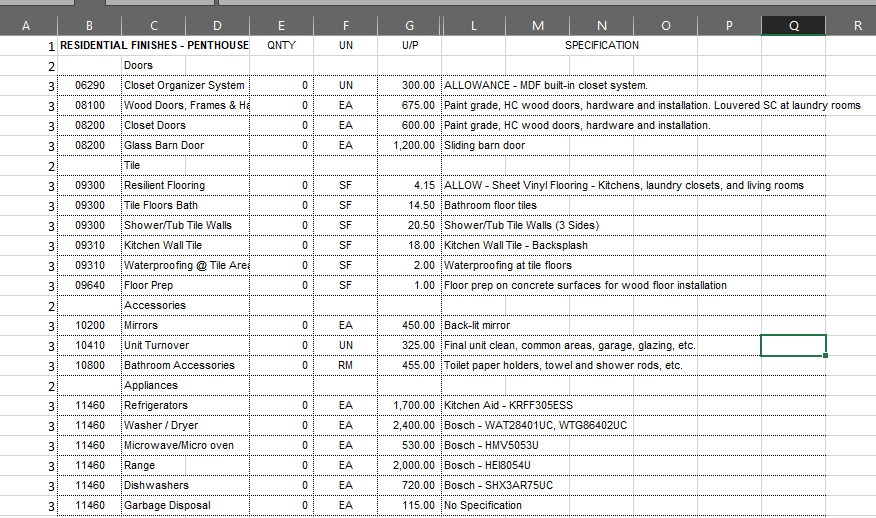
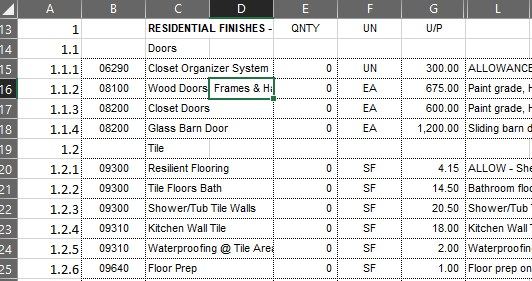
In the picture above you’ll notice that a column was added on the left named Level. By adding a Level column, Sigma can use this info to build your WBS. What this means is that when imported, you will have a heading (number 1) of Temporary Utilities, with all the other components grouped below it, at level 2. For instance, this
Will look like this in Sigma:

The same effect – that of creating your WBS – can be achieved by assigning a position number and importing to the Position column.
-
You can save the settings (mappings) for an import by clicking Settings… > Save as…, typing a name and clicking OK. Next time you import from an Excel sheet looking the same you simply click Settings… and select the saved settings.
-
If adding data to an existing WBS, that data can be copied and pasted per the above steps with or without the Level or Position columns.
-
A static column can be added to the import by clicking the Add static column button. This will add a column to each line item that contains the same value. For instance, if you have a spreadsheet that is divided into 2 phases, you could import phase 1 and add the static column containing the value Phase 1, then import the phase 2 data separately.